

Carrie Spoonemore, co-founder of “From Seed to Spoon,” stands as a beacon of inspiration for gardeners and health enthusiasts alike. Her journey alongside her husband, Dale Spoonemore, in creating a platform that demystifies gardening and promotes a healthier lifestyle, has made a significant impact on individuals around the globe. Through the “From Seed to Spoon” app, Carrie has dedicated herself to empowering people to take control of their health and environment by growing their own food.
With a profound belief in the power of gardening to improve mental and physical health, Carrie’s contributions to the Seed to Spoon blog reflect her holistic approach to wellness. Her articles often focus on the nutritional benefits of homegrown fruits and vegetables, organic gardening practices, and the mental health benefits of spending time in nature. Carrie’s expertise in health science shines through in her detailed discussions on how specific plants can contribute to a balanced diet and overall well-being.
Carrie’s passion for gardening is deeply intertwined with her commitment to family and community wellness. She frequently shares personal stories of how gardening has brought her family closer together, offering practical tips for involving children in gardening activities and making it a fun, educational experience. Her writing encourages families to explore gardening as a means of spending quality time together while learning about nature and sustainability.
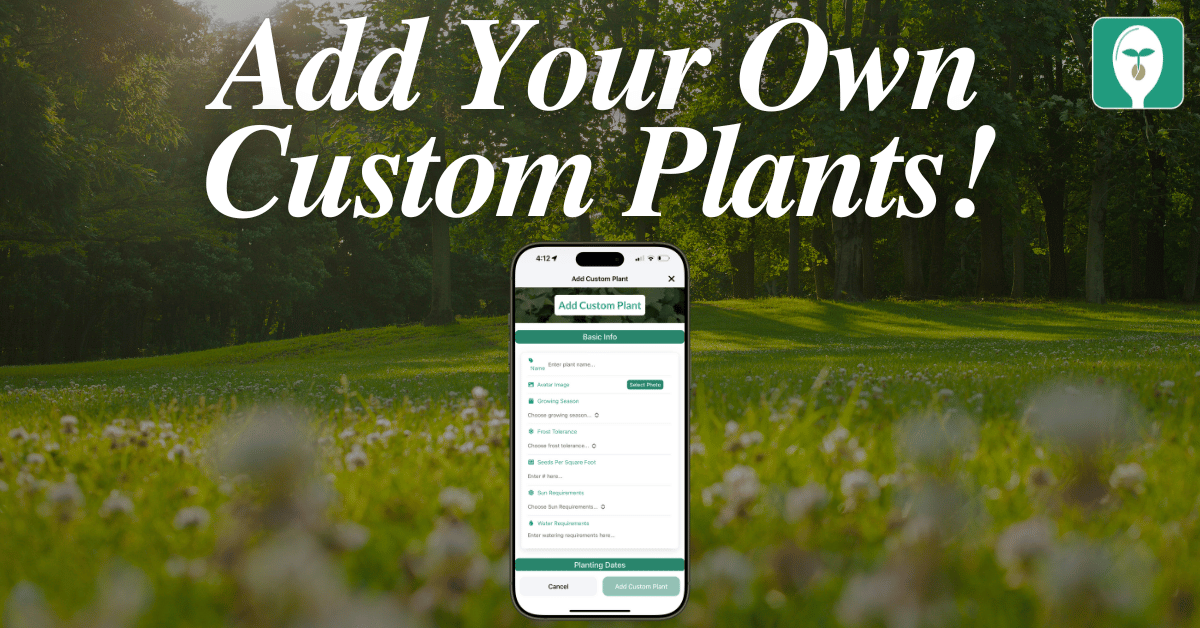
In addition to gardening advice, Carrie’s contributions to the blog include insights into the use of technology to enhance the gardening experience. She has played a crucial role in designing the “From Seed to Spoon” app to be user-friendly, ensuring that users of all ages and backgrounds can navigate the complexities of gardening with ease. Her vision for the app is not just as a gardening tool but as a vehicle for change, inspiring individuals to adopt a more sustainable lifestyle by growing their own food.
Carrie Spoonemore’s presence on the blog is marked by her compassionate approach to teaching and her unwavering belief in the transformative power of gardening. Her work continues to inspire a community of gardeners to pursue a healthier, more sustainable way of living, proving that with the right tools and knowledge, anyone can become a gardener and advocate for their health and the planet.